Smart Intercom Solution
INTEGRA VoIP APP
Answer your intercom call from anywhere in the world

Simple to Use
Intuitive user interface
Easily Configured
Setup of application done through the Welcome e-mail in just a few clicks
Audio and Video feed
Supports both audio and video feed from the intercom
Keyless Entry
Unlock your door with a push of a button
Free of Charge
We don't charge for our Integra VoIP application
Reachable anywhere in the world
As long as you're connected to the internet you will receive a call from your door
Note:
*In order to function properly, Integra VoIP APP needs IP-INTEGRA SIP-Server.
**INTEGRA VoIP APP are compatible only with phones supporting Apple's App Store and Google's Play Store
**INTEGRA VoIP APP are compatible only with phones supporting Apple's App Store and Google's Play Store
Quick Setup
AFTER THE FIRST SETUP, NEW CONFIGURATIONS AND UPDATES CAN BE PUSHED TO INTEGRA VoIP APP BY SYSTEM ADMINISTRATOR WITHOUT INVOLVING END-USERS

Welcome E-Mail
System administrator sends “Welcome E-Mail's” to end-users.
Welcome E-Mail includes detailed description on how to install and set up the IP-INTEGRA VoIP App.
E-mail includes links to AppStore and Google Play Store for installation of the IP-INTEGRA VoIP App and links for auto-connecting to the IP-INTEGRA SIP-Server.
Start IP-INTEGRA VoIP APP for the first time
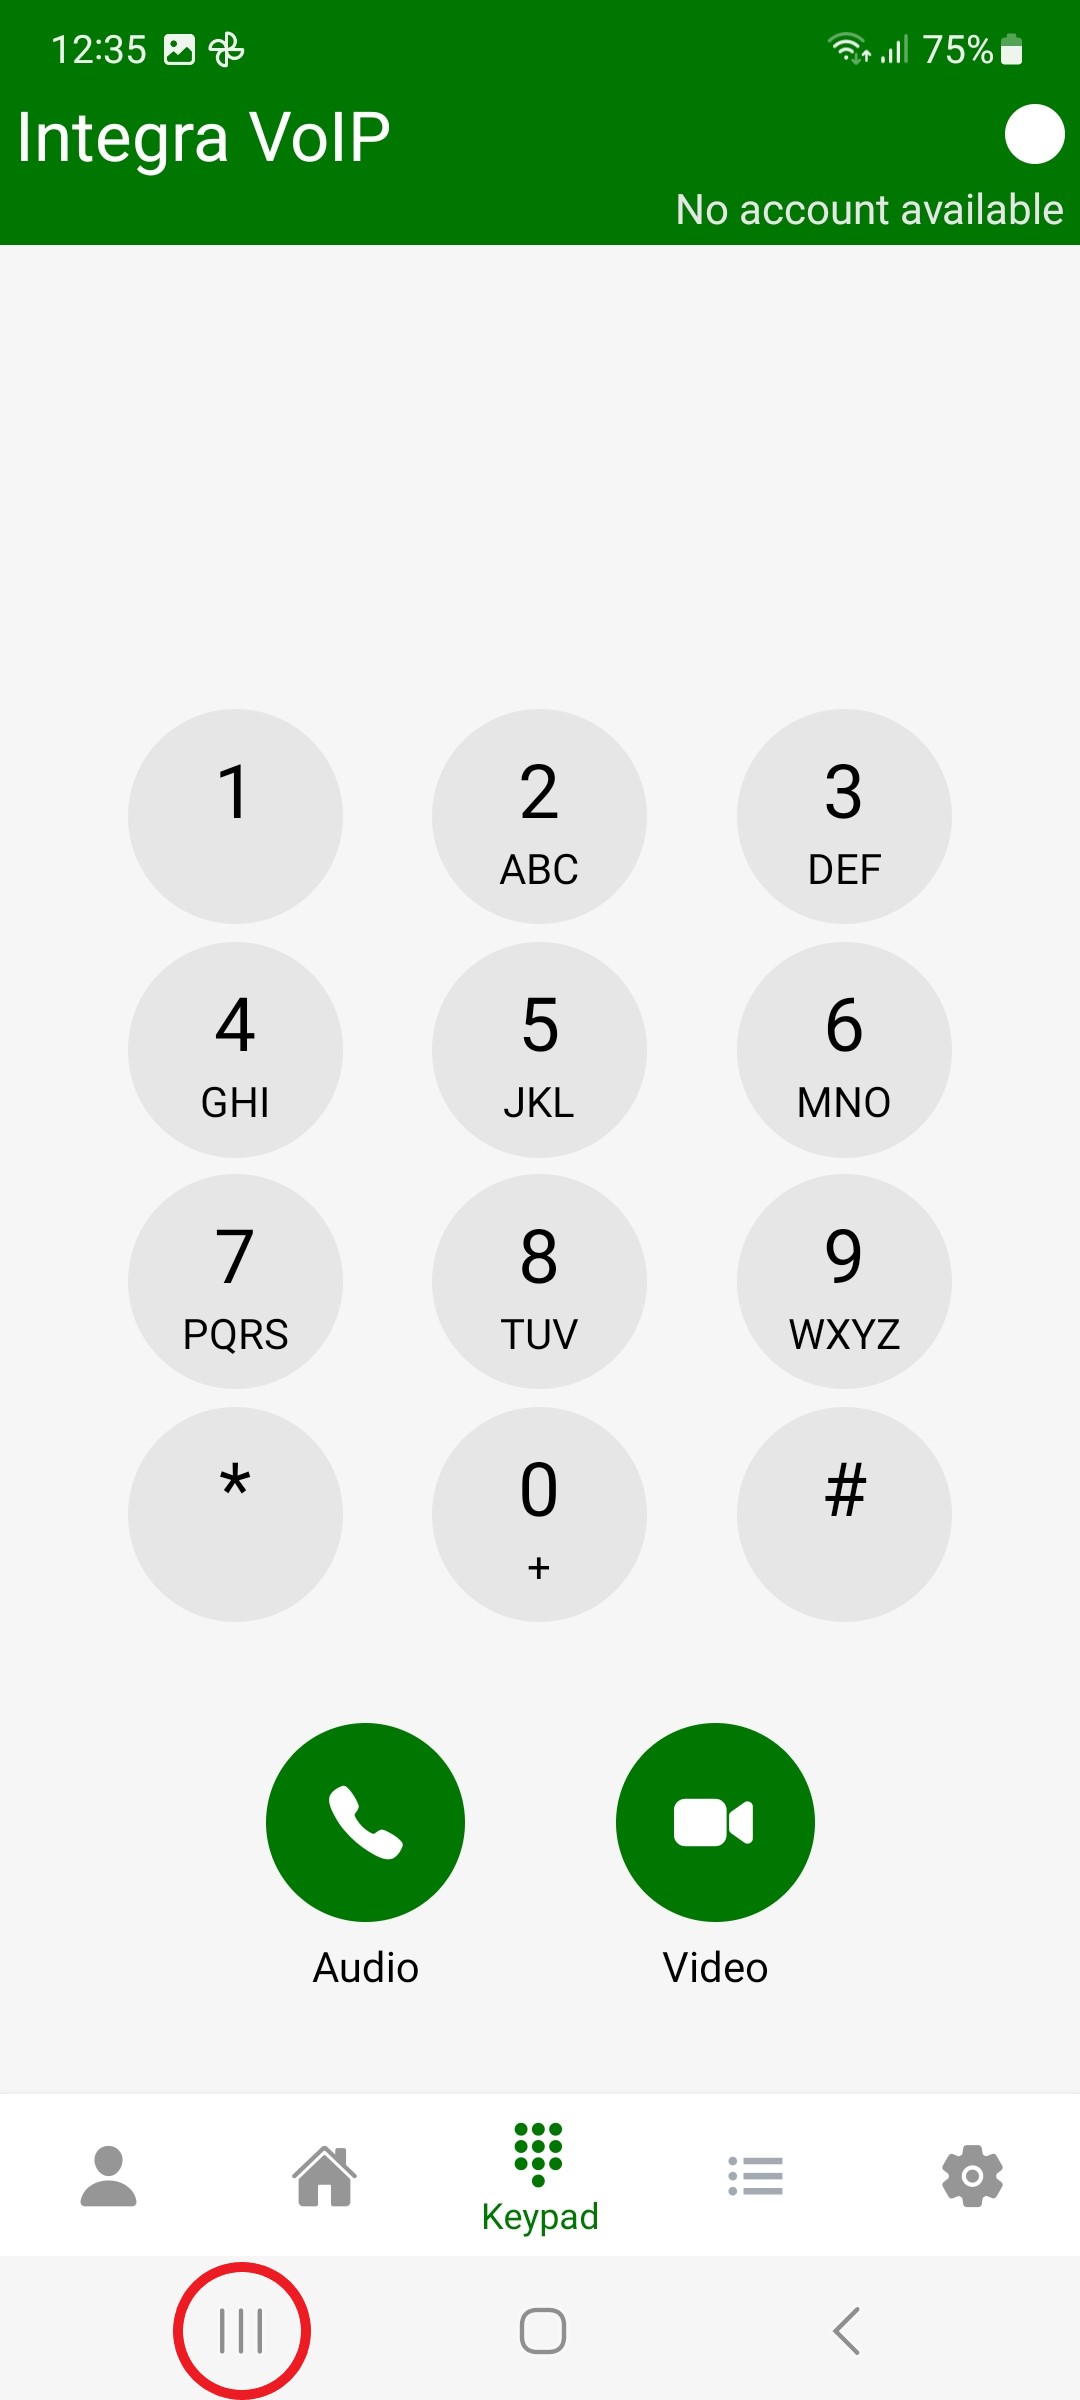
IP-INTEGRA VoIP APP will show the IP-INTEGRA TECHNOLOGIES logo.
When IP-INTEGRA VoIP APP is initialized, it starts in keypad mode.
Go to "Settings" to make the first registration.
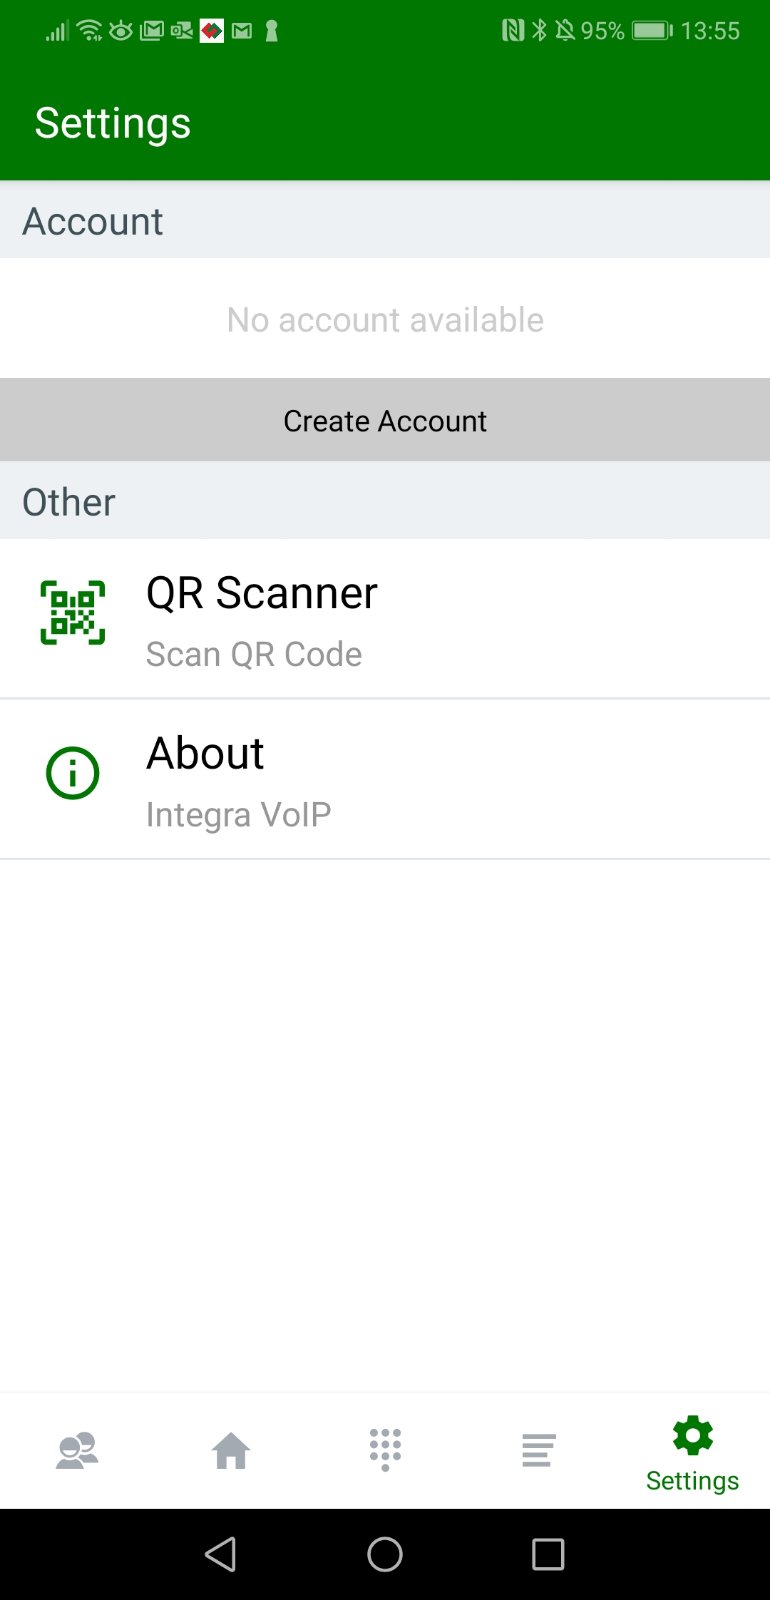
Ready for the first registration
IP-INTEGRA VoIP APP is now in "Settings" mode and ready for the first registration.
IP-INTEGRA VoIP has three different options to connect to IP-INTEGRA SIP-Server:
1. Manual Registration - by manually typing registration information from the “Welcome E-Mail".
2. Direct auto-provisioning link will setup IP-INTEGRA VoIP APP if it is on same phone as mail-client.
3. QR-code auto-provision link included in the “Welcome E-Mail”.
Scan QR-code
Instructions on how to activate end-user's extension are delivered in the “Welcome E-Mail”
Administrator have option to deliver Welcome E-mail to all or selected extensions.
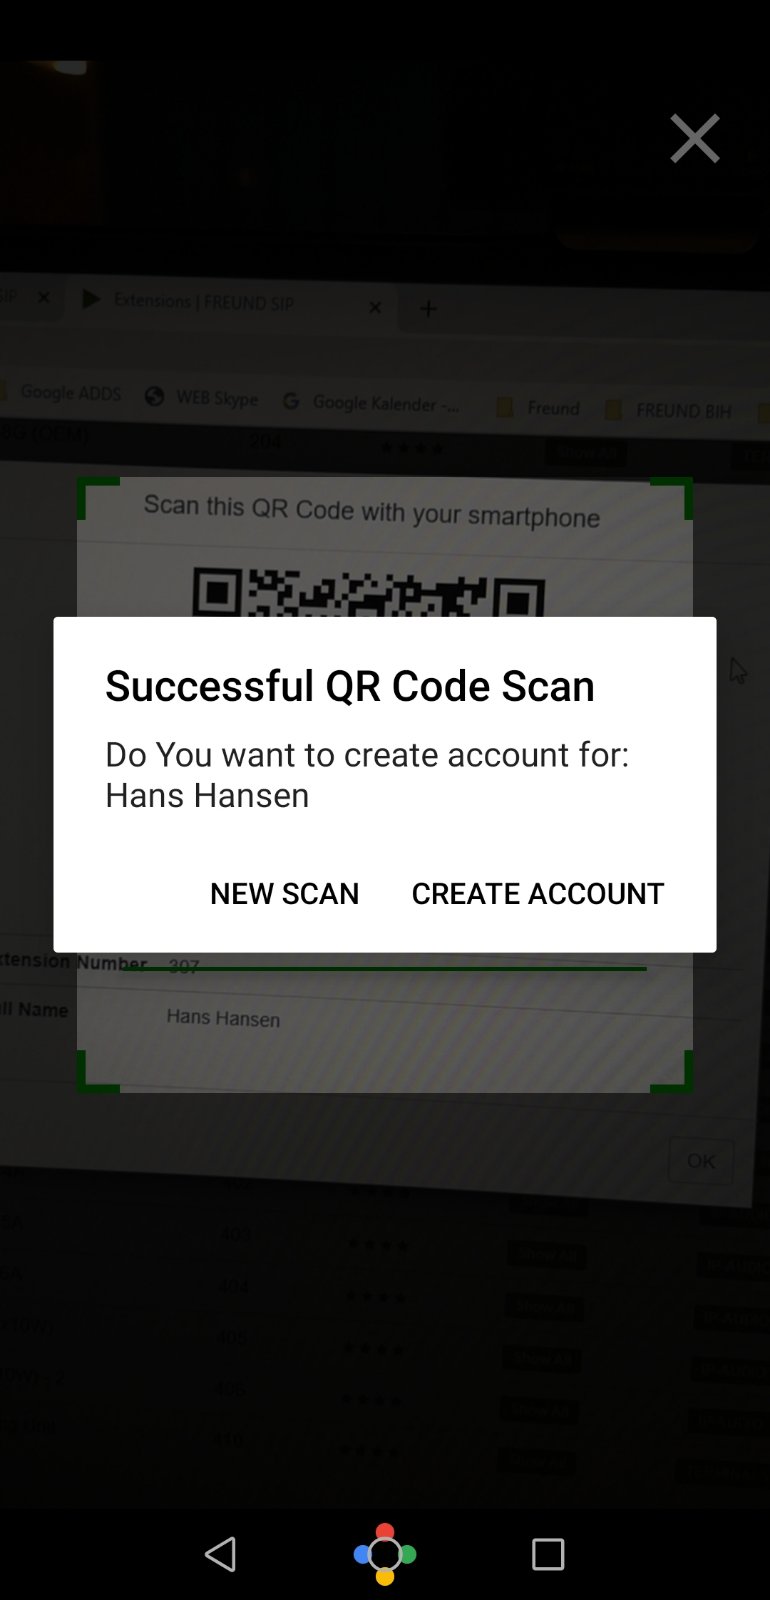
End-user can register extension directly from the e-mail or scan the provided QR code.
Action is instant and the user is connected - “Successful QR Code Scan” message is displayed.
User can proceed with "Create account" button.

Account registered and ready
After activation, registration status, account name and extension number are shown on “Settings” page
By pressing on Account name, all extension information is displayed.
Account is now registered and ready.
We highly discourage users from changing account information if account is automatically established through “Link” or “QR-code”
Please check Account status if you are not able to register or receive calls and inform your system administrator about the problem.
Find and call other extensions in “Contacts”
All contacts in user's contact group will be visible in "Contacts" page.
Administrators have option to disable this.
If any changes are made in the contact list, it will be pushed to the IP-INTEGRA VoIP app by Administrator without need for end-user interaction.
DND (Do-Not-Disturb) mode is also available to the end users.


Open your Doors and call Elevators down
Short-pressing an intercom in the list makes a call to that respective intercom while;
Long-pressing an intercom in the list will unlock the door for more convenient entry.
There is no need to make a call.
Get a call from multiple Door Stations
Receive immediate calls from your visitors through the IP-INTEGRA VoIP APP.
Effortlessly answer calls, ascertain the identity of the individual at your door, and remotely unlock the door, regardless of your proximity to your residence.
In situations where you are beyond the reach of WiFi or 3G/4G networks, calls can seamlessly redirect to your GSM number.
In summary, rest assured that you will never overlook a call from your visitor.

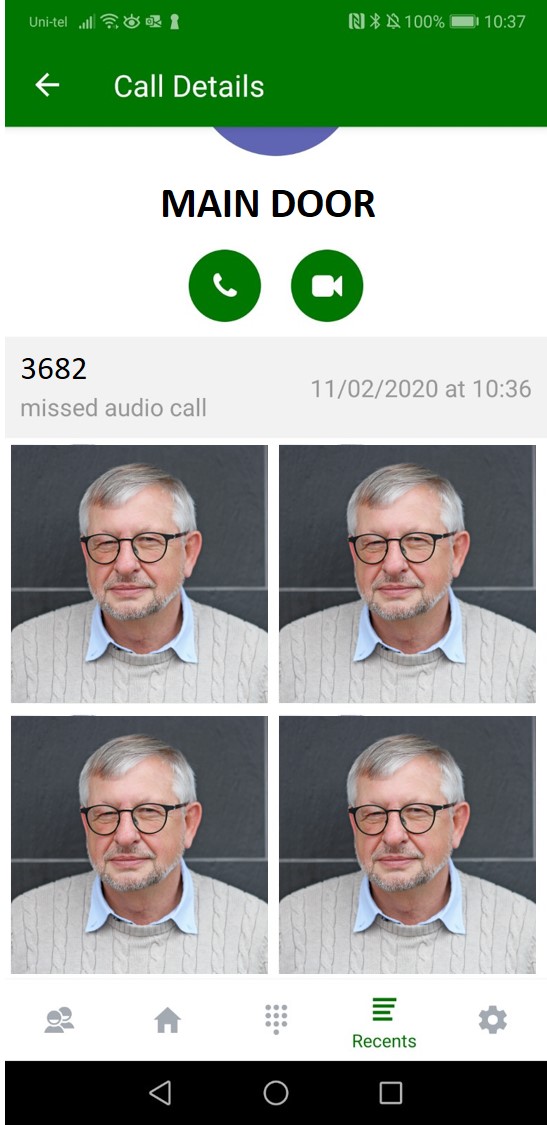
In the event that you are unable to respond to an incoming call...
There is no cause for concern. The INTEGRA VoIP APP will diligently record four images along with timestamps of your visitor in the Missed Call log.
Please be aware that the retention duration of the call log, including images, in your Missed Call log can be determined by your administrator.
Android users, please read the next section carefully.
Android users may have encountered this issue, when being called from their intercom devices, their mobile device simply won't receive a call notification – will not be ringing at all. Possible reason is that Android device is itself blocking the call. To help you understand what the problem is, we need to first explain how these calls work:
Android devices, when not used for certain periods of time, will go into „deep sleep“ mode. Deep sleep mode purpose is to save battery life by putting certain apps to
sleep. Normally, when your Android device is being called from an intercom, it will first receive a so called „push notification“ to wake up the device. Device should then go back to normal work mode and the application will receive a call and you should hear the device ringing.
Battery Optimization Restrictions (very often enabled by default) can prevent device from waking up and receiving a call.
To mitigate this, we highly encourage you to follow the steps bellow in order to remove the Battery Optimization Restrictions!
Removing Battery Optimization Restrictions
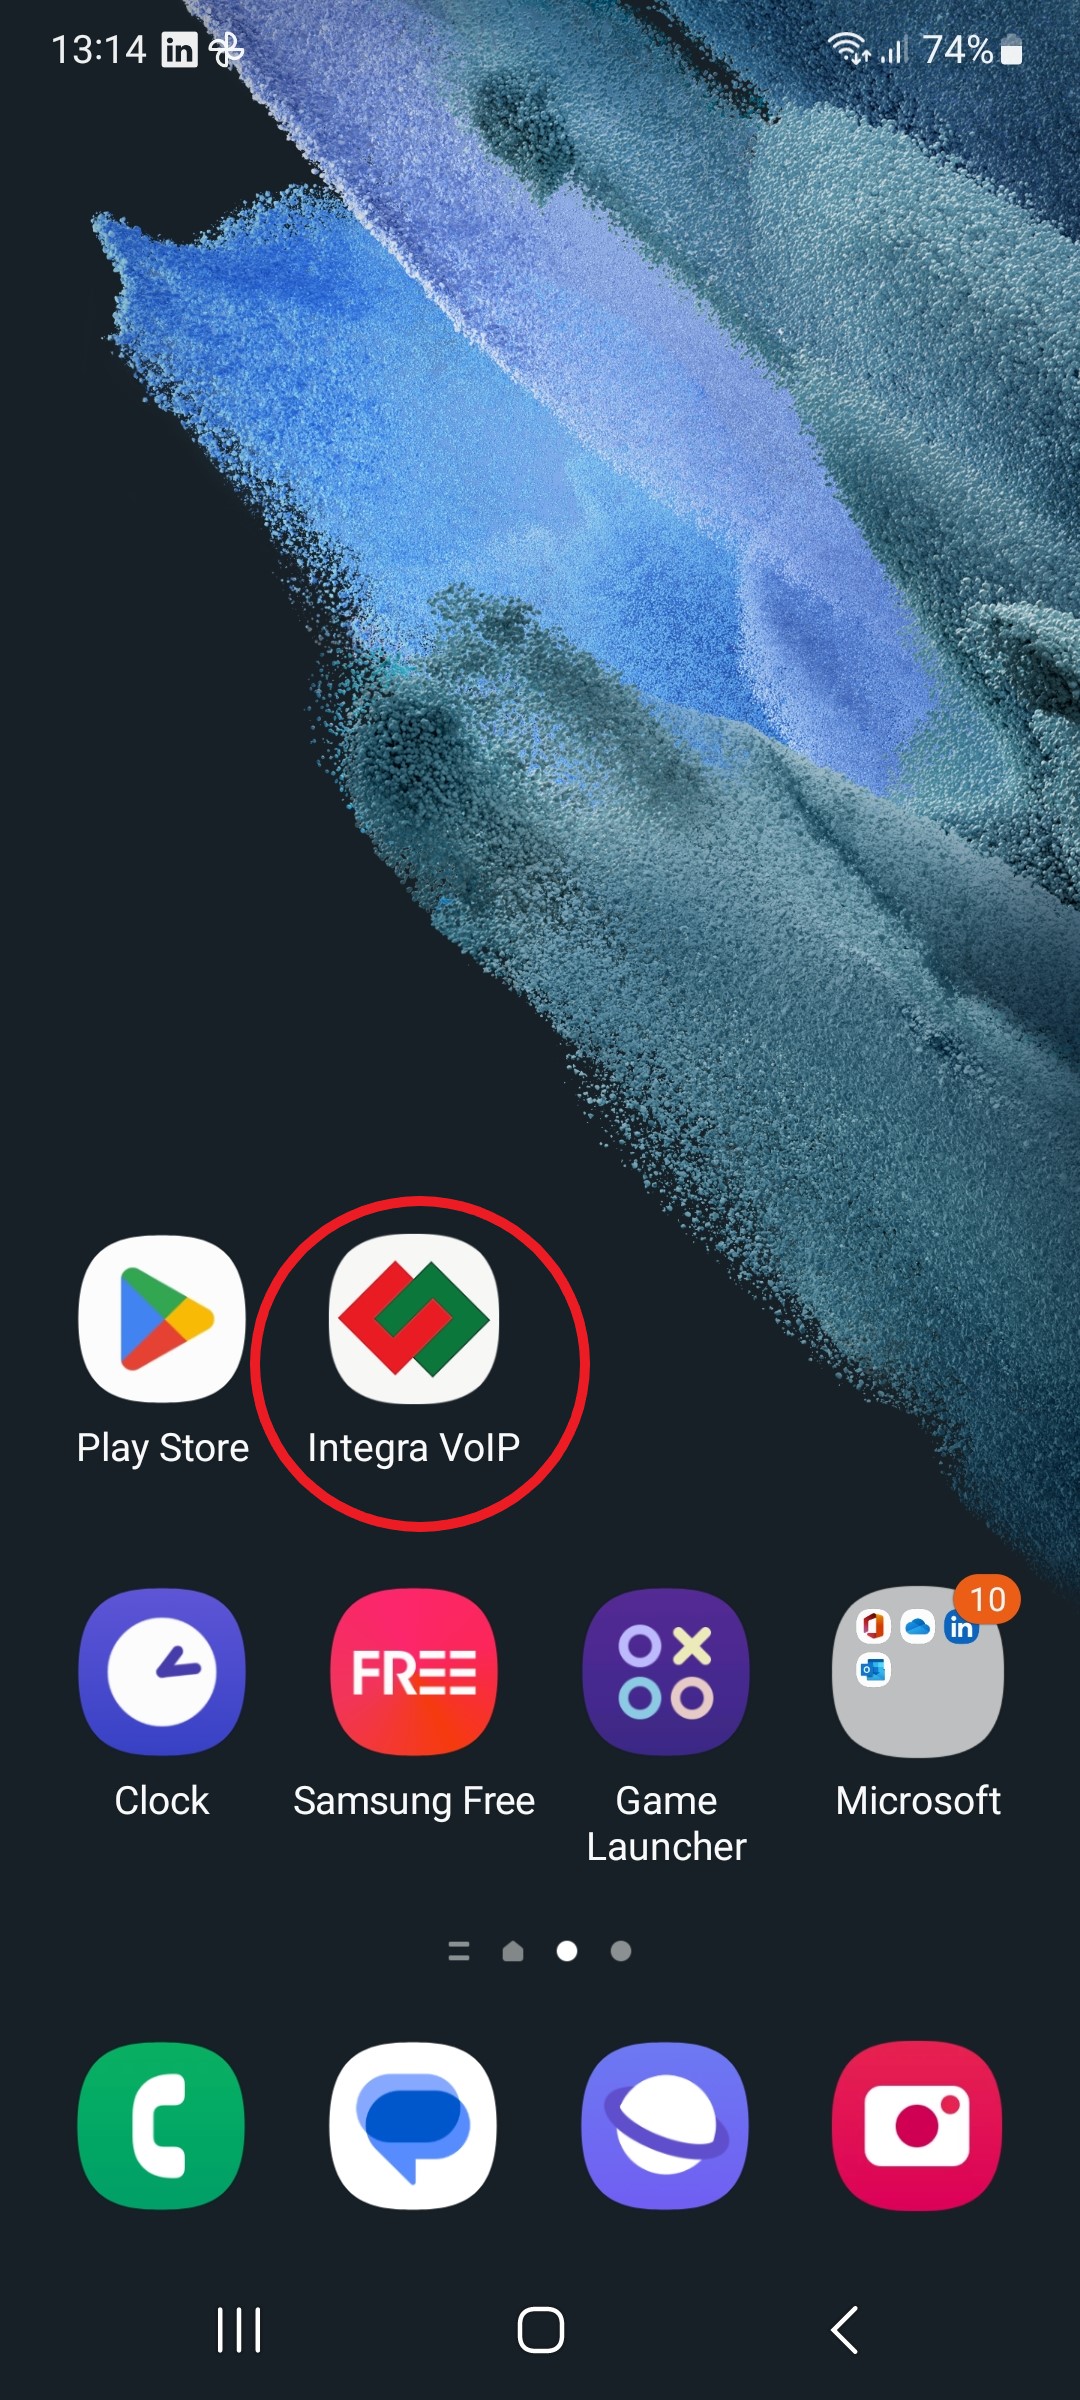
Step 1:
Find the Integra VoIP icon and long press on it.
Find the Integra VoIP icon and long press on it.
Step 2:
Tap on the Info button marked in the picture.
Tap on the Info button marked in the picture.
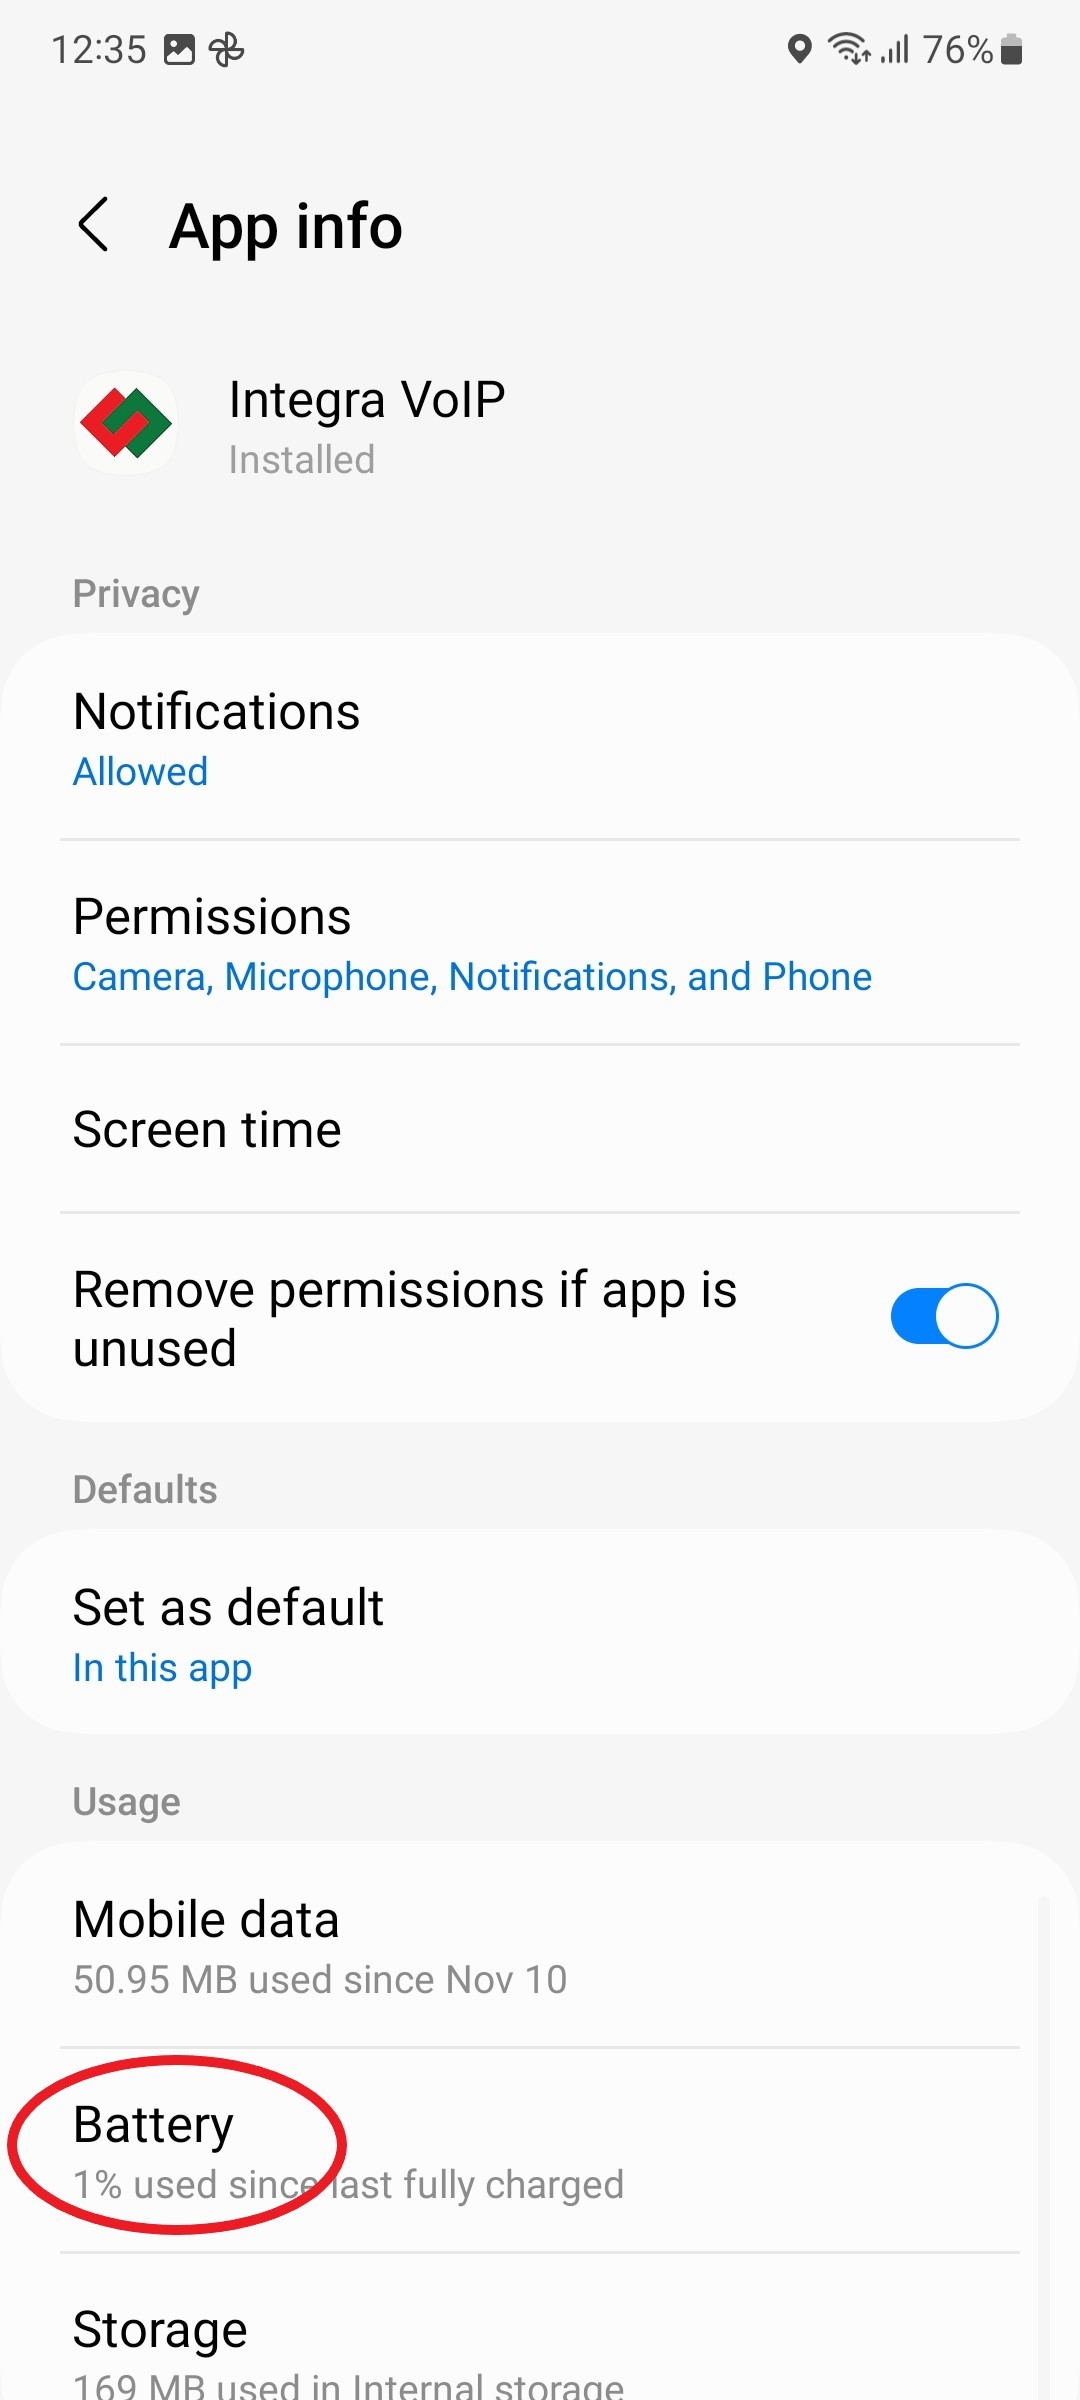
Step 3:
Locate the Battery settings and tap on it.
Locate the Battery settings and tap on it.
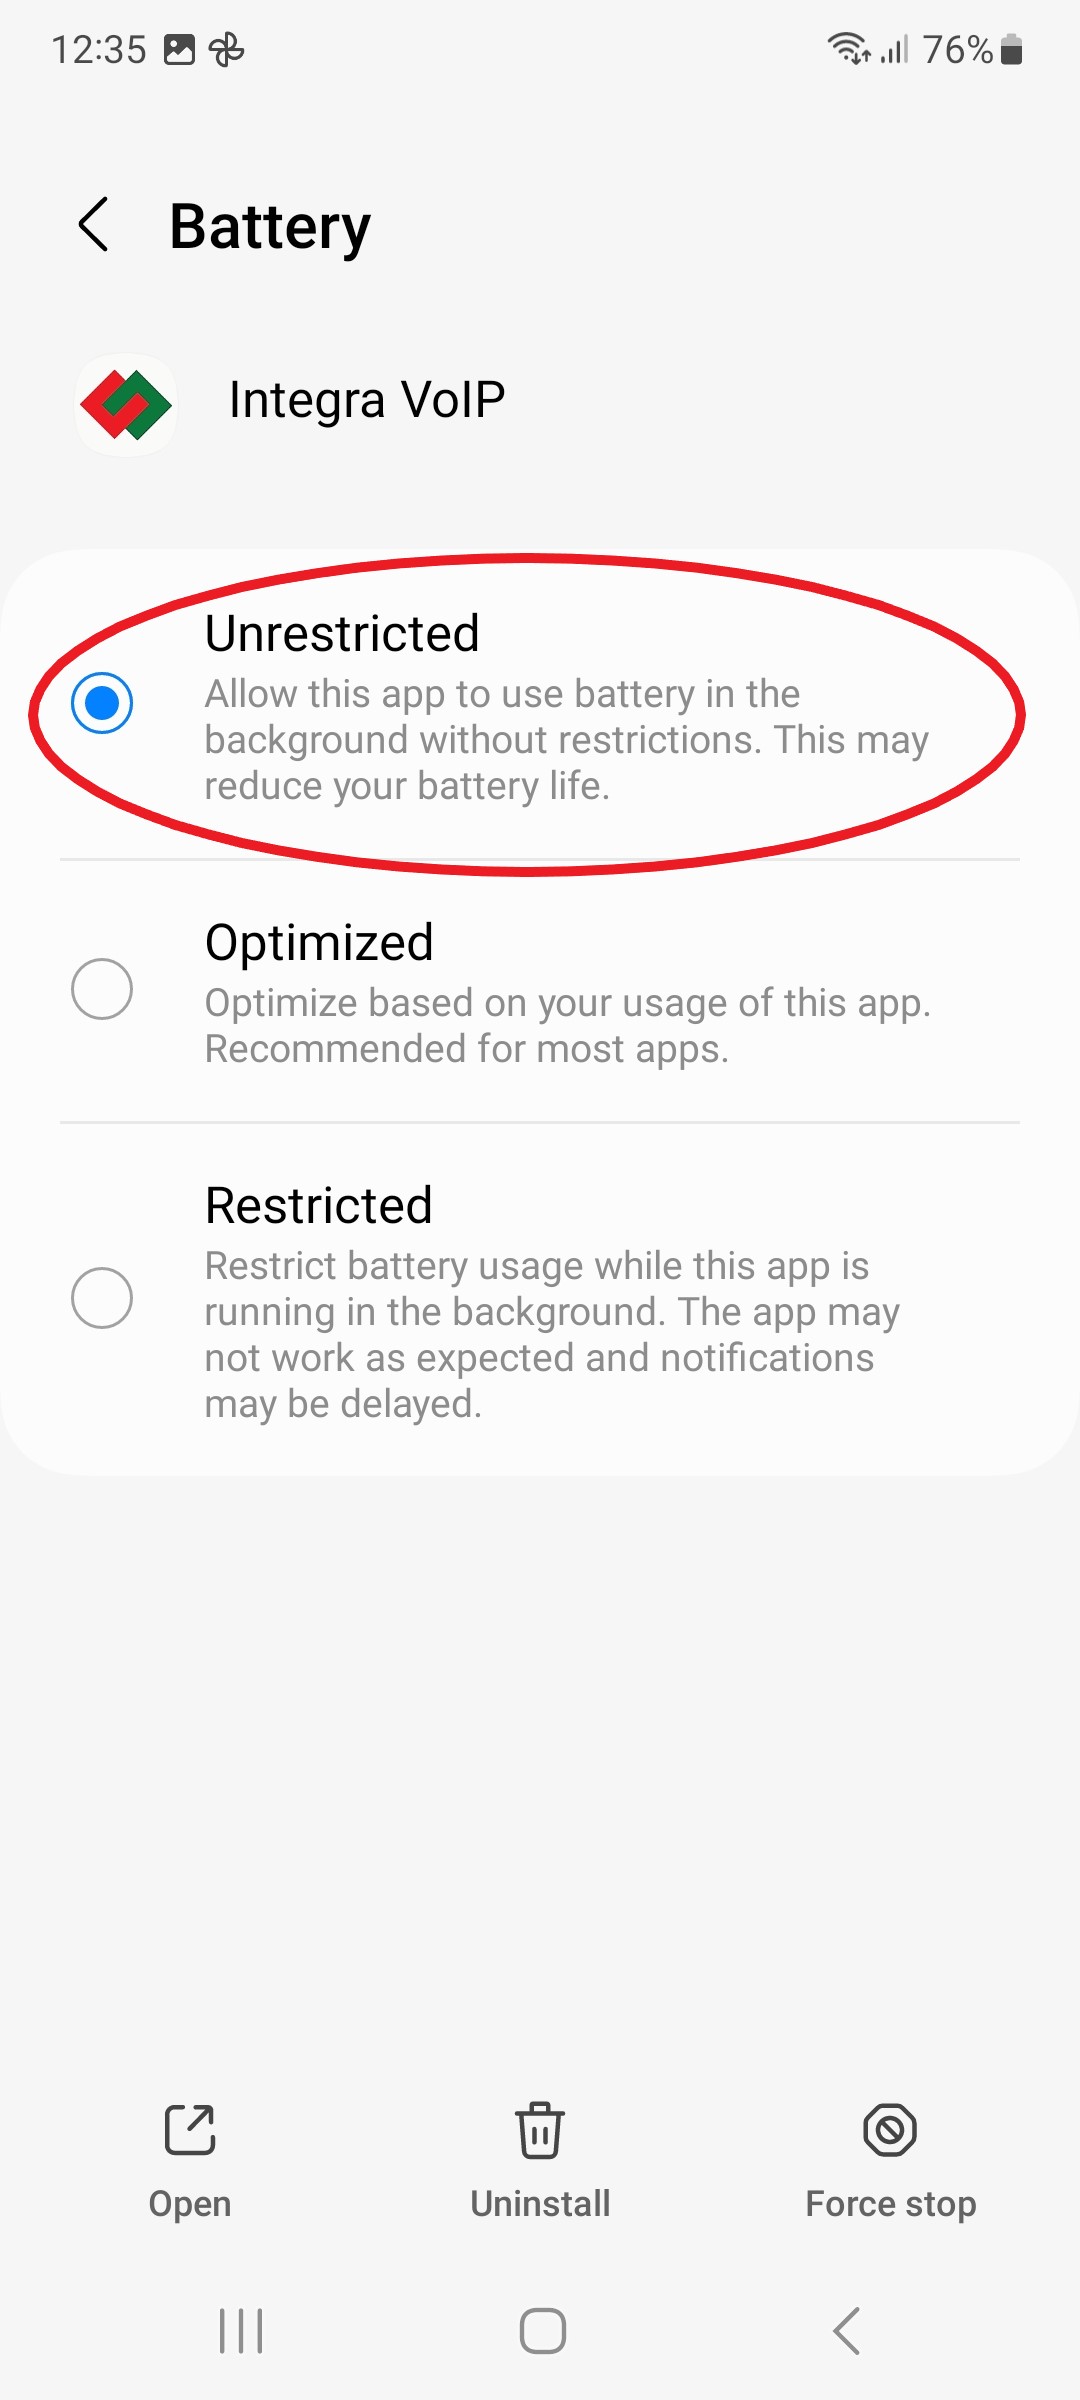
Step 4:
Select Unrestricted setting.
Select Unrestricted setting.

Keep Application Open
Step 1:
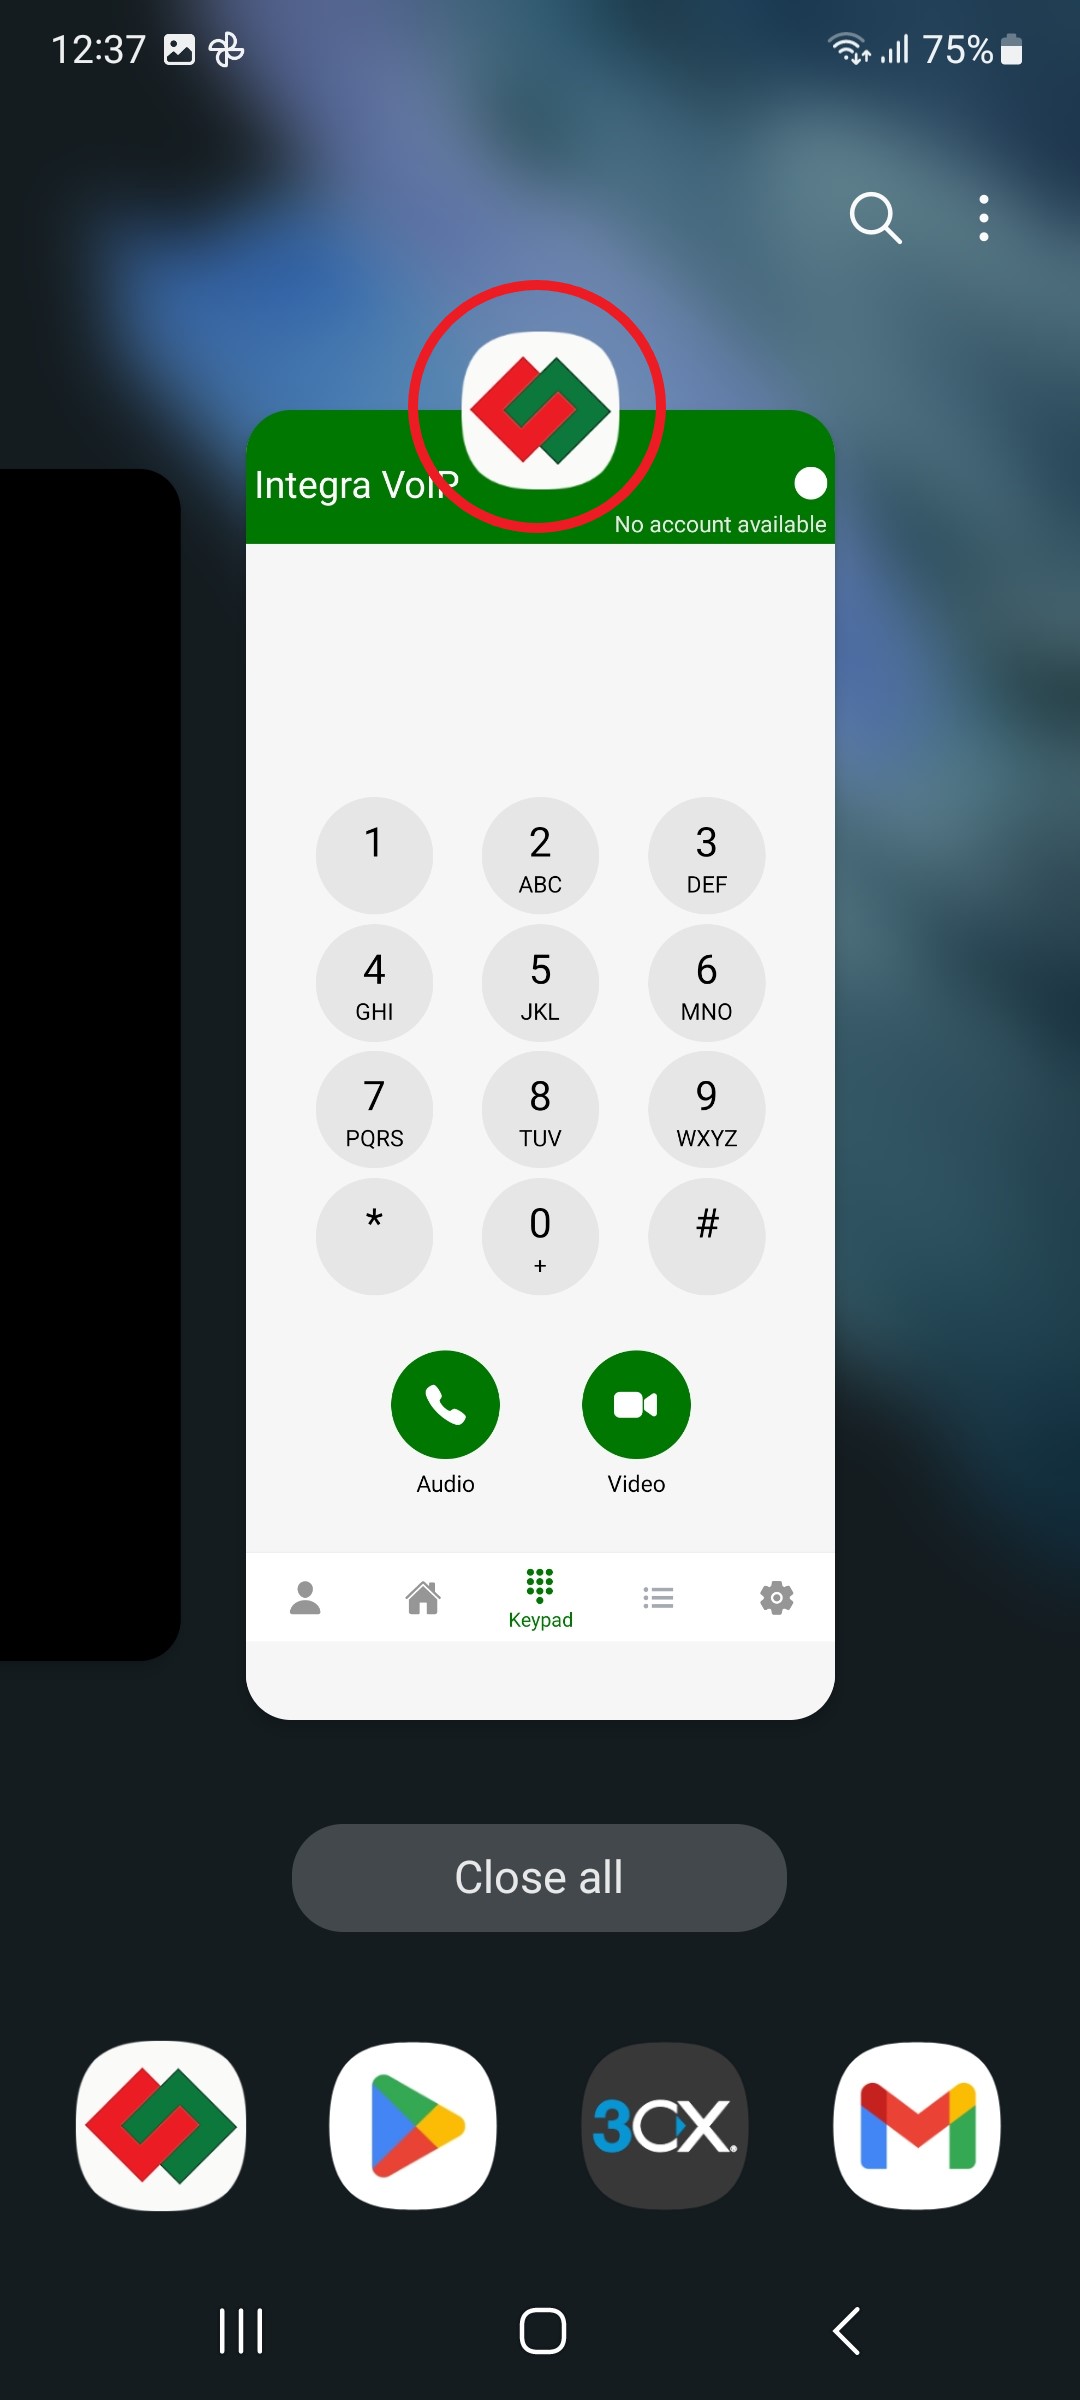
Open Integra VoIP app and tap on Recent Apps.
Open Integra VoIP app and tap on Recent Apps.
Step 2:
Tap on Integra VoIP icon.
Tap on Integra VoIP icon.
Step 3:
Tap on Keep open.
Tap on Keep open.
Step 4:
Blue Padlock icon indicates function is enabled.
Blue Padlock icon indicates function is enabled.